English


FAQ
Network congestion during video surveillance can severely impact the performance of security systems, resulting in video loss, pixelation, and delayed feeds. This issue often arises due to the high bandwidth requirements of surveillance cameras, especially when transmitting high-definition video streams over shared networks. Here are several strategies to address and prevent network congestion in video surveillance systems.
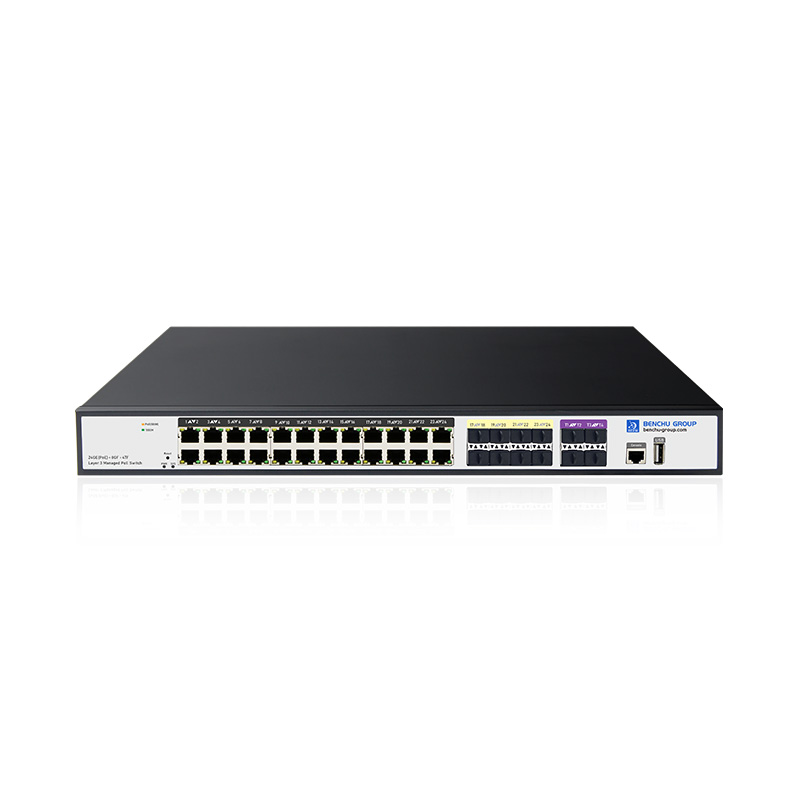
1. Segment the Surveillance Network (VLANs)
Problem: Shared networks can become congested when surveillance video streams compete with regular network traffic.
Solution: Use Virtual LANs (VLANs) to segregate surveillance traffic from other data, ensuring that video streams do not interfere with critical business applications.
Implementation:
--- Set up a dedicated VLAN for all IP cameras and the video management system (VMS).
--- Assign high-priority Quality of Service (QoS) to this VLAN to ensure video traffic is prioritized over other data types.
Example configuration:
| interface [port] |
| switchport access vlan [vlan_id] |
| switchport mode access |
2. Implement Quality of Service (QoS)
Problem: Without prioritization, critical video traffic may experience delays due to other network activities such as file transfers or voice over IP (VoIP).
Solution: Implement QoS to prioritize video surveillance traffic over non-essential traffic, reducing delays and preventing congestion.
Implementation:
--- Use network devices (switches and routers) that support QoS policies to prioritize surveillance video traffic based on port, IP range, or protocol.
--- Classify video streams as high priority while deprioritizing less critical traffic (e.g., file transfers or web browsing).
Example Cisco QoS policy:
| access-list 101 permit ip [camera_network] any |
|
class-map match-all video_traffic match access-group 101 |
|
policy-map video_priority class video_traffic set precedence critical |
3. Use Network Video Recorders (NVRs) with Local Storage
Problem: Continuous streaming from multiple cameras to a centralized server can overload the network.
Solution: Use Network Video Recorders (NVRs) with local storage, reducing the need to send high-bandwidth streams constantly across the network.
Implementation:
--- Install NVRs at strategic locations to store video data locally and only transmit low-bandwidth metadata or footage when needed.
--- Centralize video monitoring while distributing storage across the network.
4. Implement Multicast Streaming
Problem: Unicast streaming, where each camera sends an individual stream to each viewing station, consumes excessive bandwidth when multiple devices view the same feed.
Solution: Use multicast streaming, which allows a single stream to be sent to multiple viewers without duplicating traffic for each recipient.
Implementation:
--- Configure multicast on switches and routers and enable it on IP cameras and the VMS.
--- Implement the Internet Group Management Protocol (IGMP) to manage the multicast group.
Example multicast command:
| ip igmp snooping |
| interface [port] |
| ip igmp join-group [multicast_address] |
5. Optimize Camera Resolution and Frame Rate
Problem: High-resolution and high-frame-rate video streams consume significant bandwidth, leading to congestion, especially in large-scale deployments.
Solution: Adjust the camera settings to lower resolution and frame rate where full HD is not necessary.
Implementation:
--- Assess the environment and reduce resolution for areas that don’t require high-definition video.
--- Set cameras in low-traffic areas to lower frame rates (e.g., 15 FPS instead of 30 FPS) to decrease bandwidth usage without compromising video quality.
Example camera settings:
--- Resolution: 1080p to 720p for non-critical areas.
--- Frame Rate: Adjust from 30 FPS to 15 FPS where applicable.
6. Use Video Compression (H.265 or H.264+)
Problem: Raw or uncompressed video streams require large amounts of bandwidth.
Solution: Use modern video compression standards like H.265 (HEVC) or H.264+, which significantly reduce the bandwidth requirements while maintaining video quality.
Implementation:
--- Ensure that your cameras and NVRs support H.265 or H.264+, and switch to these codecs to reduce video size and bandwidth usage by 30-50%.
--- Configure video management systems to use the most efficient codecs.
7. Implement Edge Computing and Video Analytics
Problem: Streaming all video footage to a central server can cause unnecessary bandwidth usage, especially when most of the footage is not needed.
Solution: Use edge computing with cameras that have built-in video analytics, which analyze the footage locally and only transmit relevant video or alerts to the central system.
Implementation:
--- Deploy smart cameras with edge processing capabilities that analyze footage and transmit only important data or events (e.g., motion detection).
--- This reduces the amount of unnecessary data being transmitted across the network, freeing up bandwidth for critical traffic.
8. Set Up Redundant Links or Aggregated Links (LACP)
Problem: A single network link may not provide sufficient bandwidth for high-definition video streaming from multiple cameras.
Solution: Implement Link Aggregation Control Protocol (LACP) to combine multiple network interfaces into a single logical link, increasing bandwidth.
Implementation:
--- Use LACP to create aggregated links on switches and routers, effectively increasing the bandwidth available for video streams.
Example LACP configuration:
| interface range GigabitEthernet0/1 - 2 |
| channel-group 1 mode active |
9. Deploy Dedicated Surveillance Switches
Problem: Sharing network resources with other services can lead to competition for bandwidth and eventual congestion.
Solution: Use dedicated switches for the surveillance network, ensuring that surveillance data does not compete with regular data traffic.
Implementation:
--- Install managed switches that handle only surveillance traffic.
--- These switches can be optimized specifically for video traffic, with features like QoS and IGMP snooping enabled by default.
10. Use Adaptive Bitrate Streaming
Problem: Fixed bitrate streams can overwhelm the network if conditions degrade or if the network is under heavy load.
Solution: Use adaptive bitrate streaming that adjusts video quality dynamically based on available network bandwidth.
Implementation:
--- Many VMS platforms and cameras support adaptive bitrate streaming, which lowers video quality when congestion is detected and raises it when bandwidth allows.
--- This feature can help maintain network stability without sacrificing too much video quality.
11. Monitor and Optimize Network Utilization
Problem: Without proper monitoring, network congestion may go undetected until it disrupts surveillance operations.
Solution: Use network monitoring tools like SolarWinds, PRTG, or Zabbix to continuously track bandwidth usage, identify congestion points, and optimize network performance.
Implementation:
--- Set up alerts for high network utilization or packet loss and adjust QoS policies or bandwidth allocation accordingly.
Conclusion
Solving network congestion during video surveillance requires a combination of strategic network design, equipment upgrades, and configuration optimization. Segregating surveillance traffic with VLANs, implementing QoS, using multicast streaming, and optimizing camera settings are critical steps in preventing congestion. Additionally, leveraging modern technologies like H.265 compression, edge computing, and adaptive bitrate streaming can help maintain network performance while supporting high-definition video streams. By carefully planning and monitoring your network, you can ensure efficient and reliable surveillance system operation.
Inconsistent PoE power when using long cables is a common problem, especially in environments where Power over Ethernet (PoE) devices are located far from the switch. As the cable length increases, so does the resistance, leading to voltage drops and insufficient power being delivered to the powered devices (PDs), such as IP cameras or wireless access points. Below are several strategies to solve this issue and ensure consistent PoE power delivery over long cable runs:
1. Use High-Quality Ethernet Cables (Cat6/Cat6a)
Problem: Poor quality or low-category Ethernet cables, such as Cat5e, may not handle the power requirements of PoE efficiently over long distances.
Solution: Use Cat6 or Cat6a cables, which have lower resistance compared to Cat5e and can carry PoE more effectively over long distances.
Implementation:
--- Cat6 or higher cables are designed for improved performance in terms of both data and power transmission over longer distances, reducing voltage drop and power loss.
2. Limit Cable Length to Industry Standard (100m Max)
Problem: Ethernet standards typically recommend a maximum cable length of 100 meters (328 feet) for both data and PoE. Exceeding this limit causes significant voltage drops.
Solution: Ensure that your cable lengths do not exceed 100 meters. If longer runs are required, consider alternative solutions.
Implementation:
--- Measure cable lengths to ensure they fall within the recommended distance. If longer distances are unavoidable, implement solutions like PoE extenders or fiber (discussed below).
3. Deploy PoE Extenders or Repeaters
Problem: When the distance exceeds 100 meters, the PoE power drops significantly, which can lead to device malfunction or shutdown.
Solution: Use PoE extenders or PoE repeaters to extend the range beyond the 100-meter limit while maintaining sufficient power for the devices.
Implementation:
--- Install PoE extenders or repeaters at the 100-meter mark to regenerate both the data signal and the PoE power, allowing you to extend the distance without significant power loss.
--- Some PoE extenders allow you to extend the distance up to 200-300 meters by daisy-chaining multiple units.
4. Use PoE Injectors Midway in the Cable Run
Problem: Long cable runs may not provide enough power from the switch due to voltage drops, even if the distance is under 100 meters.
Solution: Use a PoE injector placed midway between the switch and the powered device to boost power over long runs.
Implementation:
--- A PoE injector will introduce additional power into the Ethernet cable at a midpoint, ensuring that the power level remains consistent as it reaches the far end.
--- Example: If the switch is not PoE-capable or struggles with long runs, a PoE injector can be added close to the PD, providing a stable power source.
5. Install Fiber Optic Cables with Media Converters
Problem: Ethernet cables, even high-quality ones, have a maximum distance limit of 100 meters, and voltage drops are inevitable over long distances.
Solution: Use fiber optic cables instead of copper Ethernet cables for long-distance connections, which can transmit data over much longer distances without power degradation. Then, use media converters to convert fiber back to Ethernet for PoE at the endpoint.
Implementation:
--- Install fiber optic cables to transmit the data over long distances and use PoE media converters to convert the signal back to Ethernet and provide PoE power at the endpoint.
--- Fiber can run several kilometers without loss of signal, making it ideal for remote devices.
6. Use PoE Switches with Higher Power Standards (PoE+/PoE++)
Problem: Standard PoE (IEEE 802.3af) supplies only up to 15.4W of power, which may not be enough to compensate for power loss over long cable runs.
Solution: Use PoE+ (IEEE 802.3at) or PoE++ (IEEE 802.3bt) switches, which provide up to 30W and 60W/90W, respectively, to ensure sufficient power is delivered to remote devices.
Implementation:
--- Upgrade to PoE+ or PoE++ switches that can deliver higher power levels, ensuring that even after voltage drops, there is enough power at the far end to run the device effectively.
--- Example: A PoE++ switch can power high-demand devices like PTZ cameras over longer distances, compensating for power loss.
7. Check for Proper Power Budgeting on the Switch
Problem: Some switches may struggle to provide consistent power across all ports when many PoE devices are connected, especially if they have limited power budgets.
Solution: Ensure the switch has sufficient PoE power budget to support all connected devices, especially over longer cables that draw more power.
Implementation:
--- Check the switch’s total power budget and compare it to the power requirements of all connected PoE devices.
--- Upgrade to a switch with a higher PoE power budget or distribute devices across multiple switches to avoid overloading any single switch.
8. Minimize Cable Resistance with Shielded Cables (STP)
Problem: Standard unshielded twisted pair (UTP) cables may experience higher resistance, which can contribute to voltage drops over long distances.
Solution: Use shielded twisted pair (STP) Ethernet cables to reduce electromagnetic interference and minimize resistance over long distances.
Implementation:
--- Install STP cables in environments where interference is likely (e.g., near power lines or large metal objects) to reduce resistance and maintain power integrity over long runs.
9. Monitor Power Delivery with SNMP Tools
Problem: Inconsistent PoE power delivery can be hard to detect until devices malfunction or shut down.
Solution: Use Simple Network Management Protocol (SNMP) tools to monitor PoE power levels on each switch port and detect potential inconsistencies or power issues.
Implementation:
--- Set up SNMP monitoring tools to track power usage on each PoE-enabled port. This can help identify issues such as underpowered devices or voltage drops in real-time.
10. Upgrade to Managed PoE Switches
Problem: Unmanaged switches offer no control or monitoring over power distribution, making it difficult to identify or address power inconsistencies.
Solution: Upgrade to a managed PoE switch that provides power monitoring, power control, and detailed logs of PoE status on each port.
Implementation:
--- Managed switches allow you to adjust power output on individual ports, monitor power consumption, and set power priorities to ensure that critical devices receive consistent power.
--- Many managed switches allow for remote troubleshooting of PoE issues, which can be invaluable in identifying problems with long cable runs.
Conclusion
To solve the problem of inconsistent PoE power when using long cables, a combination of proper cable selection, adherence to distance limits, use of extenders or injectors, and switch upgrades is crucial. Using higher quality cables, PoE extenders, or even fiber optics can help maintain power consistency over long distances. Ensuring the switch has adequate power budgeting and using managed PoE switches for monitoring and control will further prevent PoE power issues.
High PoE power consumption can strain a switch's power budget and negatively impact its performance, leading to network instability, device malfunctions, and potential overheating. To mitigate these effects, several strategies can help optimize PoE power usage, manage power distribution, and maintain switch performance. Here's how to solve the problem of high PoE power consumption affecting switch performance:
1. Use PoE Switches with Adequate Power Budgets
Problem: The switch's PoE power budget may not be sufficient to support all connected PoE devices, leading to power overloads that affect performance.
Solution: Ensure that the PoE switch has a sufficient power budget to meet the total power requirements of all connected devices.
Implementation:
--- Calculate the total power consumption of all connected devices and compare it to the switch's PoE power budget.
--- Upgrade to a switch with a higher power budget if necessary. For example, a switch rated for 370W can support more PoE devices than a switch rated for 150W.
--- Distribute PoE devices across multiple switches if upgrading a single switch is not an option.
2. Monitor and Prioritize PoE Power Allocation
Problem: Without control over power distribution, critical devices may not receive enough power, while non-essential devices consume more than necessary, affecting the overall performance of the switch.
Solution: Use managed PoE switches to monitor, prioritize, and control PoE power allocation, ensuring that essential devices always receive power.
Implementation:
--- Set PoE priorities in the switch’s configuration to ensure that critical devices (e.g., IP cameras, access points) have power precedence over non-critical devices.
Example command for Cisco devices:
| interface gigabitethernet 1/0/1 |
| power inline priority high |
Monitor power consumption per port using SNMP or the switch’s management interface to identify and adjust power-hungry devices.
3. Implement PoE Scheduling
Problem: Devices that do not need continuous power, such as IP phones or cameras in low-traffic areas, can consume unnecessary power during off-peak hours, affecting the switch's performance.
Solution: Use PoE scheduling to automatically power down or reduce power to non-essential devices during off-hours.
Implementation:
--- Set up a schedule for powering off certain devices at night or during non-operational hours to reduce power consumption and free up the switch’s power budget for other critical functions.
Example scheduling on Cisco switches:
| interface gigabitethernet 1/0/1 |
| power inline auto |
| power inline auto max 30 schedule [start_time] [stop_time] |
4. Upgrade to PoE+ or PoE++ Switches
Problem: Standard PoE (802.3af) switches may struggle with power delivery for devices that require higher power levels, such as high-end IP cameras or wireless access points.
Solution: Upgrade to PoE+ (802.3at) or PoE++ (802.3bt) switches, which provide up to 30W or 60-90W per port, ensuring better power distribution for high-demand devices.
Implementation:
--- PoE+ or PoE++ switches can deliver more power per port, reducing the overall strain on the switch’s power budget and allowing it to handle more devices or higher-powered devices.
--- This reduces the risk of overloading the switch and impacting its performance.
5. Use PoE Injectors for High-Power Devices
Problem: High-power PoE devices (such as PTZ cameras or wireless access points) can consume too much power from the switch, affecting its ability to support other devices.
Solution: Offload the power requirements of high-power devices by using PoE injectors.
Implementation:
--- Install PoE injectors in-line between the switch and the device to provide the necessary power directly, reducing the load on the switch’s PoE power budget.
--- This allows the switch to focus on data handling while the PoE injector manages power delivery.
6. Use Power-Saving Features
Problem: Continuous power supply to all devices can result in unnecessary power consumption, leading to an overstrained switch and reduced performance.
Solution: Enable power-saving features such as Energy Efficient Ethernet (EEE) or Green Ethernet, which reduce power consumption when devices are idle.
Implementation:
--- Enable EEE on the switch to reduce power consumption during low network activity. EEE puts ports into low-power mode when no traffic is passing through, conserving power for other devices.
--- Configure the switch to automatically adjust power based on the actual requirements of connected devices.
7. Implement Redundant Power Supplies
Problem: Switches with a single power source may struggle to provide consistent power when heavily loaded with PoE devices, risking both network performance and potential switch failure.
Solution: Use switches with redundant power supplies (RPS) to distribute the power load and ensure uninterrupted power delivery.
Implementation:
--- Install a switch with dual or redundant power supplies to share the load of powering PoE devices.
--- This approach ensures that even if one power supply becomes overloaded or fails, the other can continue delivering power to the switch, preserving network stability and performance.
8. Optimize Cable Length and Quality
Problem: Long or poor-quality cables can cause voltage drops, requiring more power to compensate for losses, which can affect switch performance.
Solution: Use high-quality Ethernet cables (e.g., Cat6 or Cat6a) and ensure that cable lengths do not exceed the recommended maximum of 100 meters for PoE.
Implementation:
--- Shorten cable lengths wherever possible to reduce voltage drops and minimize power consumption.
--- Use shielded and higher-grade cables like Cat6 or Cat6a, which have lower resistance, ensuring more efficient power delivery over longer distances.
9. Regular Firmware Updates
Problem: Switch firmware that is outdated may not optimize PoE power management effectively, leading to inefficiencies in power distribution and affecting overall performance.
Solution: Ensure the switch is running the latest firmware, which often includes improvements in PoE power management and network performance.
Implementation:
--- Check with your switch manufacturer for the latest firmware updates and apply them regularly to ensure optimal power management and other network performance enhancements.
10. Monitor Thermal Load and Cooling
Problem: High PoE power consumption can increase the thermal load on the switch, causing overheating and potential performance degradation.
Solution: Monitor the switch's temperature and ensure proper cooling to prevent overheating.
Implementation:
--- Install the switch in a well-ventilated area with adequate airflow or use external cooling solutions such as rack-mounted fans to reduce heat buildup.
--- Monitor the switch’s internal temperature through SNMP or its management interface and set up alerts for overheating.
Conclusion
To solve the problem of high PoE power consumption affecting switch performance, it is essential to ensure that the switch has a sufficient PoE power budget and to prioritize power allocation using managed PoE features. Implementing PoE scheduling, using injectors, upgrading to PoE+ or PoE++ switches, and optimizing cable quality can help maintain efficient power distribution. Additionally, monitoring thermal loads and updating firmware will further enhance performance and reliability.
Overheating due to inadequate cooling is a serious issue for network switches, especially in high-density PoE environments, and can lead to network instability, reduced device lifespan, or even permanent damage. Here are steps to solve the problem of switch overheating due to inadequate cooling:
1. Ensure Proper Ventilation in the Installation Area
Problem: Switches placed in poorly ventilated areas are prone to overheating as heat gets trapped, raising the internal temperature of the device.
Solution: Install the switch in an area with adequate airflow and ventilation.
Implementation:
--- Avoid placing switches in enclosed spaces like closets or cabinets without airflow.
--- Ensure that vents or air intakes are not obstructed by cables, walls, or other equipment.
--- Leave enough space (at least 2-4 inches) around the switch for airflow on all sides, especially around cooling fans and ventilation slots.
2. Use Rack-Mounted Cooling Fans
Problem: Switches installed in racks or cabinets can overheat if the rack is not properly ventilated.
Solution: Install rack-mounted cooling fans to enhance airflow within network racks or cabinets.
Implementation:
--- Place exhaust fans at the top of the rack to pull hot air out and intake fans at the bottom to bring cool air in.
--- Choose fans with adjustable speed to control the airflow and keep the temperature in check.
3. Ensure Adequate Space Between Devices in Racks
Problem: Stacking devices closely together can trap heat between them, causing switches to overheat.
Solution: Maintain adequate spacing between devices in racks to allow for better airflow and heat dissipation.
Implementation:
--- Use rack spacers or blanking panels between devices to encourage airflow.
--- Consider alternating between network switches and other devices that generate less heat to minimize the cumulative heat effect in a single rack.
4. Optimize Airflow Direction
Problem: Poor airflow direction can reduce cooling efficiency and trap hot air around the switch.
Solution: Ensure that airflow is properly directed from the front to the back of the switch or according to the switch’s design specifications.
Implementation:
--- Align the front of the switch with the cool air intake and the back with the exhaust outlet to ensure that hot air is expelled efficiently.
--- Some switches have specific airflow patterns (e.g., side-to-side), so check the manufacturer’s airflow recommendations and align the cooling system accordingly.
5. Use External Cooling Systems (e.g., Air Conditioning)
Problem: In environments with many high-power PoE switches or other heat-generating equipment, room temperature can rise to levels that exceed the cooling capacity of the switch’s internal fans.
Solution: Install external cooling systems, such as air conditioners, to regulate the temperature of the room or data center.
Implementation:
--- Use dedicated air conditioning or precision cooling systems designed for server rooms or data centers to maintain optimal ambient temperatures.
--- Monitor room temperature and ensure it stays within the manufacturer’s recommended range, typically between 18-27°C (64-80°F).
6. Monitor Switch Temperature with SNMP
Problem: Overheating issues may not be obvious until the switch begins to malfunction or shut down.
Solution: Use Simple Network Management Protocol (SNMP) or built-in management tools to monitor the temperature of the switch and set alerts for overheating.
Implementation:
--- Set up temperature thresholds in your switch’s management interface to receive alerts when the internal temperature exceeds a safe range.
--- SNMP tools can provide real-time monitoring of temperature and other environmental conditions, helping you catch overheating issues before they become critical.
7. Perform Regular Dust Cleaning
Problem: Dust accumulation inside the switch or around its fans can block airflow, causing the device to overheat.
Solution: Clean the switch’s fans, vents, and surrounding areas regularly to prevent dust buildup.
Implementation:
--- Power off the switch and use compressed air to blow dust out of the vents, fans, and internal components.
--- Consider using dust filters on air intakes in dusty environments and clean or replace these filters regularly.
8. Upgrade to Switches with Improved Cooling Features
Problem: Some older or low-end switches may not have sufficient cooling systems for high-density PoE setups.
Solution: Upgrade to switches with enhanced cooling features, such as redundant fans, better heat dissipation designs, or higher airflow capacity.
Implementation:
--- Choose switches that have dual fan systems for redundancy, ensuring that cooling continues even if one fan fails.
--- Look for switches designed for high-performance environments that include thermal monitoring and fan speed adjustment based on temperature.
9. Implement Redundant Power Supplies
Problem: High PoE power consumption can increase the thermal load on the switch, making it more likely to overheat if power management is inefficient.
Solution: Use redundant power supplies to distribute power more effectively and reduce thermal stress.
Implementation:
--- Install switches with dual or redundant power supplies to spread the power load, reducing the overall heat generated by each power supply.
10. Use Cooling Pads or Heatsinks
Problem: Switches that don’t have internal fans or have limited internal cooling may struggle with heat dissipation.
Solution: Use external cooling pads or heatsinks to enhance cooling for small or fanless switches.
Implementation:
--- Install cooling pads designed to sit under switches or other networking equipment to help dissipate heat.
--- Attach heatsinks to hot components, such as the power supply or processors, to improve heat dissipation.
Conclusion
To prevent overheating due to inadequate cooling, it's essential to ensure proper airflow, adequate spacing between devices, and maintain a cool environment through external cooling systems. Using temperature monitoring tools, performing regular maintenance, and upgrading to switches with advanced cooling features can further mitigate the risks of overheating. Regular monitoring and proactive cooling strategies will ensure your switches perform optimally without the risk of overheating.
Configuring DHCP snooping can present various challenges, such as misconfigurations, untrusted devices, or network complexity. When improperly configured, DHCP snooping can cause connectivity issues, network instability, or even security gaps. Here’s a guide to solve common problems associated with configuring DHCP snooping:
1. Ensure DHCP Snooping is Enabled on the Correct VLANs
Problem: DHCP snooping might not work correctly if it’s not applied to the appropriate VLANs, leading to incorrect or incomplete filtering of DHCP traffic.
Solution: Verify that DHCP snooping is enabled on all the VLANs that require protection from unauthorized DHCP servers.
Implementation:
Enable DHCP snooping globally and on specific VLANs. For example, on Cisco switches, you can use:
| ip dhcp snooping |
| ip dhcp snooping vlan [VLAN-ID] |
If multiple VLANs need protection, list them all:
| ip dhcp snooping vlan 10, 20, 30 |
2. Configure Trust Settings on Appropriate Ports
Problem: If ports connected to legitimate DHCP servers are not trusted, DHCP offers and acknowledgments may be dropped, leading to IP address assignment failures.
Solution: Configure trusted ports for any legitimate DHCP server or relay agent. Untrusted ports should only allow DHCP requests.
Implementation:
Configure DHCP server ports as trusted using:
| interface [interface-id] |
| ip dhcp snooping trust |
Ensure that access ports connecting to end devices remain untrusted by default to block unauthorized DHCP servers.
3. Ensure the DHCP Snooping Database is Synchronized
Problem: The DHCP snooping binding table might not be maintained properly, especially after reboots, causing IP address mismatches or network disruptions.
Solution: Ensure the DHCP snooping database is stored and synchronized periodically to a secure location to avoid loss of the binding table.
Implementation:
Configure database storage for DHCP snooping to preserve the binding table across reboots or power outages:
| ip dhcp snooping database [URL] |
Example of storing it on a TFTP server:
| ip dhcp snooping database tftp://192.168.1.1/switch-snooping-db |
Regularly synchronize the snooping database to ensure current bindings are available.
4. Check and Configure the Rate Limit on Untrusted Ports
Problem: If DHCP traffic exceeds the configured rate limit on untrusted ports, valid DHCP requests might be dropped, preventing clients from obtaining IP addresses.
Solution: Set an appropriate rate limit on untrusted ports based on network traffic volume and DHCP request rates.
Implementation:
Set a suitable rate limit to ensure legitimate DHCP traffic is allowed while still protecting against DHCP starvation attacks:
| interface [interface-id] |
| ip dhcp snooping limit rate [packets-per-second] |
Adjust the rate based on the expected number of clients on the port, for example:
| ip dhcp snooping limit rate 10 |
5. Ensure DHCP Relay (if used) is Configured Correctly
Problem: When using a DHCP relay, DHCP snooping might block traffic if the relay agent isn’t trusted or if snooping is not properly configured on all parts of the network.
Solution: Ensure DHCP relay agents are on trusted ports and that snooping is properly configured to allow the relay traffic.
Implementation:
Trust the interface where the relay agent resides:
| interface [interface-id] |
| ip dhcp snooping trust |
Verify that snooping is configured correctly across VLANs where the DHCP relay is active.
6. Verify IP Source Guard Configuration
Problem: If IP Source Guard is used without proper DHCP snooping configuration, legitimate devices might be denied access due to binding mismatches.
Solution: Ensure that IP Source Guard is correctly configured and aligned with DHCP snooping to prevent blocking legitimate traffic.
Implementation:
Enable IP Source Guard after ensuring DHCP snooping is working and the binding table is correct:
| ip verify source |
You can apply source guard on a per-interface basis to avoid DHCP-based IP spoofing attacks.
7. Check for VLAN Mismatch or Trunk Port Configuration
Problem: DHCP snooping can fail if there’s a VLAN mismatch or improper trunk configuration, preventing DHCP packets from being relayed between VLANs.
Solution: Ensure VLANs and trunk ports are configured correctly to pass DHCP traffic between the switch and DHCP servers or relays.
Implementation:
Ensure the appropriate VLANs are allowed on the trunk:
| switchport trunk allowed vlan add [VLAN-ID] |
Verify that DHCP snooping is enabled on all necessary VLANs to avoid VLAN mismatches.
8. Check for Erroneous Configuration of Option 82
Problem: DHCP Option 82 (the DHCP relay agent information option) might cause issues if not handled correctly, potentially blocking DHCP replies.
Solution: Review the configuration to ensure Option 82 is used appropriately, especially in networks that employ relay agents.
Implementation:
Enable Option 82 if needed, but ensure the switch is correctly configured to insert, forward, or remove Option 82 information based on your network setup:
| ip dhcp snooping information option |
Configure how Option 82 information is handled by the DHCP server.
9. Verify Compatibility with Network Equipment
Problem: Some older or non-compliant network devices might not handle DHCP snooping features properly, leading to issues such as dropped DHCP messages.
Solution: Ensure that all network devices (e.g., switches, routers, firewalls) are compatible with DHCP snooping and updated to the latest firmware.
Implementation:
--- Update firmware on all switches, routers, and firewalls to ensure compatibility and fix any DHCP snooping bugs.
--- Verify that third-party devices in your network are properly configured to interact with DHCP snooping.
10. Troubleshoot with Debugging Commands
Problem: It can be challenging to identify the root cause of DHCP snooping issues without detailed information on what’s happening with the DHCP traffic.
Solution: Use debugging and monitoring tools to identify potential configuration issues or packet drops.
Implementation:
Use debug commands to monitor DHCP snooping activity and pinpoint the problem. For example, on Cisco:
| debug ip dhcp snooping |
Review the logs for any error messages related to DHCP snooping, rate-limiting, or trust configurations.
Conclusion
To solve problems configuring DHCP snooping, ensure it is enabled on the correct VLANs, configure trust settings on appropriate ports, and carefully manage rate limits and DHCP relay configurations. Regularly monitor the snooping database and troubleshoot using logs and debug tools to identify and address issues early. Maintaining updated firmware and proper network configurations will ensure DHCP snooping functions effectively, improving both network security and reliability.
The lack of authentication protocols like 802.1X in a network can lead to unauthorized access, reduced security, and potential vulnerabilities. To address this problem, you need to implement 802.1X or similar authentication protocols to enforce secure access to the network, ensuring only authorized devices can connect. Here are steps to solve the problem:
1. Implement 802.1X Network Access Control
Problem: Lack of 802.1X leaves your network open to unauthorized access, as any device can connect without identity verification.
Solution: Implement 802.1X Network Access Control (NAC) to authenticate devices before they can access the network.
Implementation:
--- Deploy a RADIUS server (e.g., FreeRADIUS, Cisco ISE, Microsoft NPS) for handling 802.1X authentication requests.
Configure switches and access points to support 802.1X by enabling it on the ports:
| dot1x system-auth-control |
| interface [interface-id] |
| dot1x port-control auto |
Ensure end devices (like PCs or phones) have the necessary 802.1X supplicants installed and configured (most modern operating systems include built-in 802.1X support).
2. Set Up a RADIUS Server for Authentication
Problem: 802.1X relies on a backend server (RADIUS) for authenticating users and devices. Without a properly configured RADIUS server, 802.1X authentication will fail.
Solution: Configure and connect a RADIUS server to your switches or wireless controllers.
Implementation:
On the switch, define the RADIUS server settings:
| radius-server host [IP-Address] key [shared-secret] |
Configure the server with user or machine credentials and specify authentication methods like EAP-TLS (certificate-based) or PEAP (password-based).
Define the RADIUS server on the switch’s authentication settings:
| aaa new-model |
| aaa authentication dot1x default group radius |
3. Configure Port-Based Authentication
Problem: Without 802.1X on specific ports, unauthorized devices can gain access to the network.
Solution: Enable port-based authentication on all network access ports to ensure that each device attempting to connect is authenticated.
Implementation:
Enable dot1x on individual access ports:
| interface [interface-id] |
| dot1x port-control auto |
Define the default behavior for non-authenticated users or devices (e.g., send them to a guest VLAN or block access).
4. Use EAP Methods for Authentication
Problem: 802.1X supports multiple Extensible Authentication Protocol (EAP) methods, and choosing the wrong method can cause compatibility issues.
Solution: Select the appropriate EAP method based on your network security needs and device capabilities.
Implementation:
--- For high security, use EAP-TLS with client certificates, which offers mutual authentication (both client and server authenticate each other):
--- Issue certificates to users/devices through a Public Key Infrastructure (PKI).
--- Configure clients to use EAP-TLS in their network connection settings.
--- For environments without certificates, use PEAP (Protected EAP), which uses a combination of username/password authentication protected by a TLS tunnel.
5. Establish a Guest VLAN for Unauthenticated Devices
Problem: Devices that fail 802.1X authentication may be completely disconnected, potentially leading to operational issues for guests or unauthorized users.
Solution: Create a guest VLAN or restricted VLAN for unauthenticated devices, allowing limited or isolated network access.
Implementation:
Configure the switch to assign unauthenticated users to a guest VLAN:
| interface [interface-id] |
| dot1x guest-vlan [VLAN-ID] |
Ensure that devices in the guest VLAN have limited network privileges, such as internet-only access or access to a captive portal for further authentication.
6. Enable MAC Authentication Bypass (MAB) for Legacy Devices
Problem: Some older devices, such as printers or IoT devices, may not support 802.1X authentication.
Solution: Implement MAC Authentication Bypass (MAB) to allow devices without 802.1X capabilities to access the network using their MAC addresses.
Implementation:
Configure the switch to allow MAB:
| interface [interface-id] |
| mab |
Create a MAC address whitelist on your RADIUS server for known devices that need network access without 802.1X support.
7. Provide a Fallback Mechanism
Problem: If 802.1X authentication fails or devices don't support it, users may be left without network access.
Solution: Provide fallback mechanisms, such as guest access or web-based captive portals for non-802.1X-compliant devices.
Implementation:
--- Redirect unauthenticated users to a captive portal for guest access or manual login.
--- Integrate your captive portal with the RADIUS server to maintain centralized authentication and logging.
8. Implement Robust Logging and Monitoring
Problem: Without monitoring, you may not realize when devices fail to authenticate, or you might miss potential security breaches.
Solution: Implement robust logging and monitoring for 802.1X events to track successful and failed authentication attempts.
Implementation:
Enable RADIUS accounting on the switch to log authentication events:
| aaa accounting dot1x default start-stop group radius |
Use network management tools or SIEM (Security Information and Event Management) systems to monitor 802.1X logs and generate alerts for suspicious behavior.
9. Test and Validate Your Configuration
Problem: Configuration errors or compatibility issues between devices and 802.1X settings can lead to authentication failures or misconfigurations.
Solution: Test your 802.1X setup thoroughly before deploying it network-wide.
Implementation:
--- Test different types of devices (laptops, smartphones, IoT devices) to ensure they authenticate correctly.
--- Validate that fallback mechanisms (like guest VLANs or MAC Authentication Bypass) function as expected.
10. Train Network Users
Problem: End-users might face difficulties understanding or configuring their devices for 802.1X authentication.
Solution: Provide users with clear instructions for setting up 802.1X on their devices.
Implementation:
--- Share step-by-step guides for configuring 802.1X supplicants on common operating systems (e.g., Windows, macOS, Linux).
--- Offer support through IT help desks to assist users with certificate installation or EAP method selection.
Conclusion
To address the lack of authentication protocols like 802.1X, implement a complete 802.1X authentication framework with a RADIUS server, ensure proper configuration on network switches and access points, and use secure EAP methods for device and user authentication. Additionally, consider implementing fallback mechanisms like MAC Authentication Bypass for legacy devices and a guest VLAN for unauthenticated users. Finally, maintain monitoring and logging to track and resolve authentication issues efficiently.
High fault rates with SFP (Small Form-factor Pluggable) modules can cause serious network performance issues, such as frequent link failures, degraded performance, and communication interruptions. These faults may stem from a variety of factors including compatibility issues, poor handling, improper installation, environmental factors, or even faulty modules themselves. Here’s how to address and mitigate high fault rates with SFP modules:
1. Ensure Compatibility Between SFP Modules and Switches
Problem: Incompatible SFP modules can lead to intermittent connection issues or outright failures.
Solution: Always use SFP modules that are compatible with your network devices. Check the vendor's recommended module list or opt for OEM-certified or approved third-party SFPs.
Implementation:
--- Verify that the SFP module matches the switch specifications (e.g., data rate, wavelength, connector type).
--- Use vendor-supported modules (e.g., Cisco SFPs with Cisco switches) for guaranteed compatibility.
--- If using third-party modules, confirm that the module is properly coded to work with your equipment.
2. Handle SFP Modules Properly to Avoid Damage
Problem: Physical damage to SFP modules during installation or removal can lead to faults.
Solution: Use proper techniques when inserting or removing SFP modules, as they are delicate components.
Implementation:
--- Always handle SFP modules by their casing and avoid touching the connectors or circuitry.
--- Use an electrostatic discharge (ESD) wrist strap when handling modules to prevent static damage.
--- Insert modules firmly but gently into their slots and ensure they are properly seated.
--- Use the correct extraction tool (like a latch or lever) to remove SFP modules instead of pulling them forcefully.
3. Check for Clean and Secure Fiber Connections
Problem: Dirty or poorly connected fiber cables can cause signal loss or degraded transmission, leading to high fault rates.
Solution: Ensure that all fiber connectors and SFP module interfaces are clean and securely connected.
Implementation:
--- Use fiber optic cleaning tools (such as lint-free wipes or cleaning pens) to remove dust or debris from the fiber connectors.
--- Inspect the fiber optic cable for any bends, kinks, or damage that could affect performance.
--- Ensure the fiber cable is properly seated and locked into the SFP module.
4. Monitor Temperature and Power Levels
Problem: SFP modules may overheat or experience power fluctuations, leading to faults and potential failure.
Solution: Monitor and control temperature and power levels within the operating range specified by the manufacturer.
Implementation:
--- Regularly check the temperature and voltage levels on the switch or router using SNMP monitoring tools or command-line interfaces:
| show interfaces transceiver details |
--- This command shows detailed SFP information including temperature, voltage, and laser bias current.
--- Ensure the environment where the equipment is housed has proper ventilation and cooling to prevent overheating.
--- Check if the power supply in the switch is providing consistent voltage to the SFP module.
5. Check for Proper SFP Module Installation
Problem: Improper installation or loose connections can lead to high fault rates or intermittent connectivity issues.
Solution: Ensure that the SFP module is properly seated in the port and that it is locked in place.
Implementation:
--- Gently push the SFP module into the slot until it clicks into place.
--- Make sure the latch is secured to prevent the module from coming loose.
--- If the module has a pull-tab or latch, use it carefully during both installation and removal to avoid damaging the module or port.
6. Perform Diagnostic and Error Logging
Problem: Frequent SFP failures could result from either the SFP module itself or from issues within the network infrastructure, making it difficult to pinpoint the root cause.
Solution: Enable diagnostics and error logging on your switches or routers to track SFP performance and identify potential issues.
Implementation:
Use diagnostics to check SFP module performance and status. For example, on Cisco devices:
| show interface transceiver |
Review the error counters for packet drops, CRC errors, or other link-related issues that may indicate SFP problems.
Log and review SFP module status periodically to identify trends or recurring faults.
7. Test for Faulty Cables or Poor Fiber Quality
Problem: Poor quality fiber optic cables, connectors, or damaged cabling can cause performance degradation or failure of SFP modules.
Solution: Test and replace damaged or low-quality fiber cables, and ensure that cables meet the necessary standards for distance and transmission type.
Implementation:
--- Use optical power meters or OTDR (Optical Time Domain Reflectometer) tools to measure the signal strength and identify issues in the fiber cable.
--- Ensure the fiber cable’s attenuation and distance limits are within the acceptable range for the SFP module being used.
8. Use Digital Diagnostic Monitoring (DDM)
Problem: High fault rates can occur without obvious visible issues, making it difficult to diagnose the source of the problem.
Solution: Use Digital Diagnostic Monitoring (DDM) to monitor the real-time operating conditions of SFP modules.
Implementation:
Enable DDM on the switch or router to track critical metrics like:
--- Temperature
--- Supply voltage
--- Laser bias current
--- Transmit (Tx) optical power
--- Receive (Rx) optical power
Use the collected data to identify potential issues such as signal degradation or overheating before failure occurs.
9. Replace Faulty or Failing SFP Modules
Problem: SFP modules can degrade over time or be faulty from the start, leading to recurring issues.
Solution: Replace faulty or failing SFP modules as soon as possible to restore stability.
Implementation:
--- If diagnostics show consistently poor performance or repeated errors, replace the SFP module with a new, tested one.
--- Consider maintaining a stock of spare SFP modules for quick replacements to minimize downtime.
10. Verify Firmware Compatibility
Problem: SFP modules may not function properly with certain switches due to firmware or software version incompatibility.
Solution: Ensure that both the switch and SFP modules are running on compatible firmware and software versions.
Implementation:
--- Check the switch’s release notes or compatibility guide for the correct SFP firmware.
--- Update the switch to the latest firmware version that supports the SFP modules.
--- If necessary, upgrade the firmware on the SFP modules (if supported) to resolve any software-related issues.
Conclusion
To solve the issue of high fault rates with SFP modules, focus on ensuring proper compatibility between devices, handling SFP modules correctly, maintaining clean and secure fiber connections, and monitoring the environmental conditions like temperature and power. Utilize diagnostics tools, perform regular checks on cables, and ensure that firmware and software are up to date. Addressing these factors will significantly reduce SFP-related faults and ensure reliable network performance.
Network isolation caused by improper VLAN (Virtual Local Area Network) settings can lead to communication failures between devices that should be able to interact, as well as security and connectivity issues. Proper VLAN configuration is crucial for maintaining network segmentation, security, and performance. Here’s how to address and solve the problem of network isolation due to improper VLAN settings:
1. Understand VLAN Structure and Requirements
Problem: Incorrect VLAN assignment or misunderstanding of network segmentation needs can result in devices being isolated unintentionally.
Solution: Clearly define the VLAN structure and requirements for network segmentation.
Implementation:
--- Identify the groups of devices that need to communicate with each other and assign them to the same VLAN.
--- Ensure that VLAN tagging and numbering are consistent across all switches and network devices.
--- Map out the network topology to visualize which devices belong to which VLANs.
2. Configure VLANs Consistently Across Switches
Problem: Inconsistent VLAN settings across different switches can cause devices to lose connectivity or become isolated.
Solution: Ensure that VLAN configurations are synchronized across all switches in the network.
Implementation:
--- Use VLAN Trunking Protocol (VTP) or manually configure VLANs on all switches.
--- Verify that the same VLAN IDs are being used across all devices, and that VLAN settings are consistent.
Regularly check VLAN configurations with commands like:
| show vlan brief |
If using VTP, ensure that all switches are in the same VTP domain and set the VTP mode correctly (client, server, or transparent).
3. Check Trunk Port Configuration
Problem: Misconfigured trunk ports can lead to VLANs not being properly carried across switches, causing devices on different switches to become isolated.
Solution: Properly configure trunk ports to carry all required VLANs between switches.
Implementation:
Ensure that trunk ports are configured correctly and allowed to carry all necessary VLANs:
| interface [interface-id] |
| switchport mode trunk |
| switchport trunk allowed vlan [vlan-list] |
Make sure the native VLAN on the trunk matches the configuration on both ends of the link:
| switchport trunk native vlan [VLAN-ID] |
Use commands to verify trunk status:
| show interfaces trunk |
4. Enable Inter-VLAN Routing for Communication Between VLANs
Problem: Devices on different VLANs cannot communicate with each other, leading to unintended isolation.
Solution: Enable Inter-VLAN routing on a Layer 3 switch or router to allow communication between VLANs.
Implementation:
Configure SVIs (Switched Virtual Interfaces) for each VLAN on the Layer 3 device:
| interface vlan [VLAN-ID] |
| ip address [IP address] [subnet mask] |
Ensure routing is enabled on the Layer 3 switch or router:
| ip routing |
Add static routes or use a dynamic routing protocol if needed for broader network communication.
5. Check VLAN Membership on Access Ports
Problem: Devices may be isolated if they are connected to access ports that are assigned to the wrong VLAN.
Solution: Verify that access ports are assigned to the correct VLANs for the devices connected to them.
Implementation:
Ensure each access port is assigned to the correct VLAN:
| interface [interface-id] |
| switchport mode access |
| switchport access vlan [VLAN-ID] |
Use the command to verify VLAN membership:
| show interfaces switchport |
6. Verify VLANs on the Switches and Routers
Problem: VLANs may not be properly defined or enabled on the switches, resulting in network isolation.
Solution: Ensure that VLANs are created and active on all switches and routers in the network.
Implementation:
Use the following command to display VLANs on a switch:
| show vlan |
Verify that the VLANs you expect are present and active. If a VLAN is missing, create it:
| vlan [VLAN-ID] |
| name [VLAN-name] |
Ensure that the VLAN is not administratively down.
7. Ensure Native VLAN Consistency
Problem: Native VLAN mismatches between trunk ports can cause VLAN traffic to be dropped or misrouted, leading to communication issues.
Solution: Ensure that the native VLAN is consistent across all trunk links.
Implementation:
On each switch connected by a trunk link, make sure the native VLAN is the same on both ends:
| switchport trunk native vlan [VLAN-ID] |
If necessary, use the management VLAN as the native VLAN for simplicity and to avoid confusion.
8. Use VLAN Pruning to Reduce Unnecessary Traffic
Problem: Excessive VLAN traffic across trunks can lead to congestion and miscommunication between VLANs.
Solution: Use VLAN pruning to limit unnecessary VLAN traffic on trunk ports.
Implementation:
Manually prune VLANs that are not needed on specific trunk links:
| switchport trunk allowed vlan remove [VLAN-ID] |
If using VTP pruning, ensure it's enabled to dynamically prune unnecessary VLAN traffic on trunks:
| vtp pruning |
9. Enable Spanning Tree Protocol (STP) to Prevent Loops
Problem: Network loops due to incorrect VLAN configuration or faulty cabling can cause broadcast storms, isolating parts of the network.
Solution: Enable Spanning Tree Protocol (STP) to prevent loops and ensure proper VLAN operation.
Implementation:
Ensure that STP or Rapid Spanning Tree Protocol (RSTP) is enabled on all switches:
| spanning-tree vlan [VLAN-ID] |
Regularly check for STP errors or blocked ports using:
| show spanning-tree vlan [VLAN-ID] |
10. Test VLAN Connectivity
Problem: Improper VLAN settings may not be immediately obvious and could lead to long-term network isolation if left unaddressed.
Solution: Test VLAN connectivity regularly to ensure devices can communicate as expected.
Implementation:
--- Use ping and traceroute commands to test communication between devices on the same VLAN and across different VLANs.
--- Verify connectivity using tools like VLAN scanners or network management software that can detect misconfigured VLANs.
Conclusion
To resolve the problem of network isolation caused by improper VLAN settings, ensure that VLANs are correctly configured across all devices, trunk ports are set up properly, and access ports are assigned to the right VLANs. Utilize inter-VLAN routing for communication between different VLANs and monitor for any native VLAN mismatches or trunk-related issues. Regular testing and monitoring of VLAN configurations will help maintain proper network segmentation and avoid unintentional isolation.
To solve the problem of mismatched Maximum Transmission Unit (MTU) sizes causing packet fragmentation, you can take several steps to ensure a more consistent and reliable network performance:
1. Discover the Optimal MTU Size
First, identify the largest MTU that can pass through your entire network without fragmentation. You can do this by using ping with the Don't Fragment (DF) flag. Here’s an example on a Linux or Windows system:
Windows:
| ping -f -l |
Linux:
| ping -M do -s |
Start with a packet size of 1500 (the common default MTU for Ethernet networks), and decrease the size gradually until you find the maximum value that doesn’t result in fragmentation.
2. Adjust MTU Size on Network Devices
Once you have determined the optimal MTU, configure all network devices (routers, switches, and endpoints) along the path to match this size. This will ensure consistency, reducing the likelihood of fragmentation.
On Windows: You can change the MTU using the netsh command:
| netsh interface ipv4 set subinterface "Local Area Connection" mtu=1450 store=persistent |
On Linux: Use the ip command:
| sudo ip link set dev eth0 mtu 1450 |
3. Enable Path MTU Discovery (PMTUD)
Path MTU Discovery (PMTUD) is a protocol that allows devices to dynamically discover the optimal MTU along a path. Ensure that PMTUD is enabled on routers and devices. It automatically adjusts packet sizes to avoid fragmentation.
4. Use Jumbo Frames Carefully
If you’re using jumbo frames (MTU greater than 1500 bytes), ensure that all devices in the network support the same MTU size. Otherwise, packets larger than the supported MTU will fragment or be dropped.
5. Monitor Fragmentation
Implement network monitoring to detect packet fragmentation. Tools like Wireshark or other network analyzers can help identify fragmented packets and pinpoint the source of the mismatch.
6. Check Firewall and Security Device Configurations
Some firewalls or security devices might block ICMP traffic, which is necessary for PMTUD to work properly. Ensure that ICMP packets are allowed across the network, especially the "Fragmentation Needed" messages.
7. Review VPN or Tunnel MTU Settings
If you're using VPNs or tunneling protocols, these often add extra headers, reducing the effective MTU size. Adjust the MTU accordingly for the tunnel or use tunnel fragmentation features (like TCP MSS clamping) to avoid packet fragmentation.
By standardizing MTU sizes across your network or dynamically adjusting them with PMTUD, you can reduce fragmentation and improve network performance.
Poor grounding can lead to significant electrical interference issues, affecting the performance and safety of your electrical systems. Here are steps to solve grounding problems and reduce electrical interference:
1. Verify Grounding Connections
Inspect Grounding Points: Check all grounding connections, including at outlets, electrical panels, and equipment. Ensure they are properly secured and free of corrosion.
Use Proper Grounding Rods: Ensure that grounding rods or stakes are correctly installed and connected to the grounding system. They should be driven deep enough into the ground to provide a low-resistance path.
2. Check for Ground Loops
Identify Ground Loops: Ground loops occur when there are multiple grounding paths with differing potentials, causing interference. Look for multiple grounding points that could create loops.
Isolate Ground Loops: Use isolators or ground loop isolators to break the loop. Ensure that equipment is grounded to a single point to avoid creating multiple ground paths.
3. Ensure Proper Wiring Practices
Use Shielded Cables: For sensitive equipment, use shielded cables to reduce electromagnetic interference (EMI). Ensure shields are properly grounded at one end to avoid ground loop issues.
Separate Power and Signal Cables: Keep power cables separate from signal cables to reduce the potential for interference.
4. Improve Grounding System Design
Implement a Grounding System: Design and implement a comprehensive grounding system for your facility or equipment. This should include a low-resistance grounding path and proper grounding of all equipment.
Use Grounding Conductors: Use conductors of adequate size and material to handle expected currents and provide effective grounding.
5. Inspect and Repair Electrical Panels
Check Electrical Panels: Ensure that electrical panels have a solid and continuous ground connection. Look for loose or corroded connections and repair them as needed.
Verify Panel Grounding: Ensure that the panel’s grounding system complies with local electrical codes and standards.
6. Monitor and Mitigate Electrical Interference
Use Ferrite Beads: Place ferrite beads on cables to filter out high-frequency interference.
Install Filters: Use EMI filters on power lines to reduce the impact of electrical noise.
7. Consult Professionals
Hire a Qualified Electrician: If you’re unsure about grounding issues or solutions, consult with a licensed electrician. They can perform a thorough assessment and recommend appropriate solutions.
Conduct Grounding Audits: Regularly audit your grounding system to ensure it remains effective and compliant with standards.
By addressing these areas, you can significantly reduce electrical interference caused by poor grounding and improve the performance and safety of your electrical systems.
Frequent switch reboots due to an unstable power supply can disrupt network performance and reliability. To address this issue, consider the following steps:
1. Check and Stabilize the Power Supply
Inspect Power Sources: Verify that the power source providing electricity to the switch is stable and within the required voltage range. Fluctuations or inconsistencies can cause reboots.
Use a Surge Protector: Install a surge protector to safeguard against voltage spikes and surges that can cause instability.
Install an Uninterruptible Power Supply (UPS): A UPS can provide backup power and stabilize the voltage, protecting the switch from power interruptions and fluctuations.
2. Examine Power Cables and Connections
Check Cables: Ensure that power cables are in good condition, properly connected, and free of damage. Replace any frayed or damaged cables.
Secure Connections: Make sure all power connections are secure and firmly plugged into both the switch and the power source.
3. Verify Power Supply Specifications
Check Voltage and Current Ratings: Confirm that the power supply matches the switch’s specifications for voltage and current. Using an incorrect power supply can lead to instability.
Ensure Proper Rating: Ensure the power supply or adapter is rated for the switch model you are using, and check for any manufacturer-recommended specifications.
4. Monitor for Overloading
Avoid Overloading Circuits: Make sure the circuit supplying power to the switch is not overloaded with other devices. Overloading can cause voltage drops and power instability.
Distribute Load: Distribute electrical loads across multiple circuits if necessary to prevent overloading.
5. Inspect the Switch for Faults
Check for Hardware Issues: Look for any hardware issues within the switch itself, such as faulty internal components. A hardware malfunction could cause intermittent reboots.
Update Firmware: Ensure the switch’s firmware is up-to-date. Sometimes, firmware issues can cause unexpected reboots.
6. Perform Regular Maintenance
Schedule Regular Inspections: Regularly inspect the power supply system and connections to ensure they remain in good condition and function properly.
Maintain the UPS: If using a UPS, perform regular maintenance checks to ensure it is operating correctly and the battery is in good condition.
7. Consult with Professionals
Hire an Electrician: If you are unable to identify or resolve power issues, consult a licensed electrician. They can perform a thorough assessment and ensure the power supply is stable and reliable.
Contact Switch Manufacturer: If the problem persists, contact the switch manufacturer for support. They may offer additional troubleshooting steps or replacement options if the switch is defective.
By addressing these areas, you can help stabilize the power supply and reduce the frequency of switch reboots, improving overall network reliability.
Slow or lagging port performance on a network switch can impact network efficiency and user experience. Here are steps to diagnose and resolve this issue:
1. Check Network Cables and Connections
Inspect Cables: Ensure that network cables are in good condition and properly connected. Look for any signs of wear, damage, or loose connections.
Use Quality Cables: Verify that you are using cables that meet the required specifications (e.g., Cat5e, Cat6, or Cat6a) for the port speed (e.g., 1Gbps, 10Gbps).
2. Verify Port Settings
Check Speed and Duplex Settings: Ensure that the port speed and duplex settings on the switch match those of the connected device. Mismatched settings can cause performance issues.
Auto-Negotiation: Ideally, use auto-negotiation to automatically match settings. If set manually, ensure both ends of the link are configured identically.
Update Configurations: Adjust settings if needed to match the capabilities of the connected devices.
3. Examine Network Traffic
Monitor Traffic Load: Use network monitoring tools to analyze the amount of traffic passing through the port. High traffic volumes can lead to congestion and slow performance.
Identify Bottlenecks: Look for potential network bottlenecks or excessive broadcast traffic that might be affecting port performance.
4. Check for Errors and Collisions
Review Error Logs: Access the switch’s logs or status page to check for any errors or collisions on the port. High error rates can indicate problems with the cable, device, or switch port.
Address Errors: Investigate and resolve any errors or collisions to improve performance.
5. Update Firmware and Software
Update Firmware: Ensure the switch’s firmware is up-to-date. Manufacturers often release updates that fix bugs and improve performance.
Update Network Drivers: Update network drivers on connected devices if applicable, as outdated drivers can affect performance.
6. Verify Port Utilization
Check Utilization: Use the switch’s management interface or monitoring tools to check port utilization. High utilization may indicate that the port is being overused or is insufficient for the network’s needs.
Balance Load: Distribute network traffic across multiple ports or switches if needed to balance the load and improve performance.
7. Inspect Switch Hardware
Check for Overheating: Ensure that the switch is not overheating. Overheating can cause performance issues. Verify that the switch has adequate ventilation and is operating within its temperature range.
Examine Hardware Condition: Look for any physical damage or signs of wear on the switch. Faulty hardware may need repair or replacement.
8. Review Network Design
Optimize Network Topology: Evaluate the network design to ensure it supports efficient data flow. Poor network design can lead to bottlenecks and slow performance.
Consider Upgrading: If the switch is outdated or unable to handle current network demands, consider upgrading to a higher-performance model.
9. Consult Documentation and Support
Review Documentation: Check the switch’s documentation for any specific recommendations or settings related to port performance.
Contact Support: If the issue persists despite troubleshooting, contact the switch manufacturer’s support team for further assistance.
By systematically addressing these areas, you can identify and resolve issues causing slow or lagging port performance, leading to a more efficient and reliable network.
 E-Mail Us
 Call Us
 Address
5F, Block5, GuangmingGu Industrial Park, Matian Villiage, Guangming Disitrict, Shenzhen, China


 IPv6 network supported